

Journal Gift Guide: Thoughtful Journals for Everyone on Your List
Not sure which journal to give? Compare lined, dot-grid, grid, blank, and guided journals and match the right one to everyone on your gift list.

A customer invoice in your email. A receipt in your truck. A bank statement saved somewhere on your computer. If that sounds familiar, you are not alone. Business records often arrive through several different channels, making them easy to misplace before you have time to record or file them.
An organized system brings those scattered details together. It helps you find documents, understand financial activity, and provide information to your accountant without searching through drawers or downloading a year’s worth of statements at once.
You do not need a complicated filing cabinet or expensive software to get started. You need clear categories, a designated place for incoming documents, and a routine you can realistically maintain.
Quick answer: To organize business records, gather your documents, sort them by record type and year, establish matching paper and digital folders, record financial transactions in a consistent bookkeeping system, and file supporting documents after processing them. Review your records regularly and establish retention and backup procedures.
Start by collecting the records you already have. Before designing a new system, you need to understand what you are working with.
Check the places where documents tend to accumulate:
For the initial cleanup, use one temporary paper tray and one digital folder labeled “To Sort.” This gives you a central place to work without forcing you to make every filing decision immediately.
Separate business records from personal documents. If a transaction involves both business and personal use, flag it for review rather than assuming the entire amount belongs in your business expenses.
Working with a backlog? Begin with the current year and keep older records separate. That lets you establish a useful system now while organizing previous years in manageable batches.
A good business filing system groups documents according to their purpose. Avoid starting with dozens of folders; broad categories are easier to maintain.
Use this structure as a starting point:
| Record category | Examples |
| Income and sales | Customer invoices, sales reports, payment confirmations, deposit records |
| Expenses and purchases | Receipts, supplier invoices, paid bills, purchase confirmations |
| Banking and credit cards | Statements, check records, deposit slips, financing documents |
| Payroll and employment | Payroll reports, wage records, withholding information, employee documents |
| Mileage and vehicle use | Trip logs, parking receipts, toll records, vehicle expense documents |
| Taxes | Filed returns, payment confirmations, tax notices, supporting schedules |
| Contracts and business administration | Client agreements, leases, insurance policies, licenses, formation documents |
| Property and equipment | Purchase documents, warranties, improvement records, disposal or sale information |
The IRS identifies receipts, invoices, paid bills, deposit slips, and canceled checks as supporting documents for business transactions. These records support the entries in your books and the information reported on tax returns.
Adjust the categories to fit your operation. A landlord may need separate folders for each property, while a contractor may organize certain documents by job. A consultant might maintain client-specific contract folders alongside general income and expense records.
You do not have to choose between paper and digital records. A hybrid system can work well when each format has a clear role.
For example, you might use a business record keeping book to summarize transactions, paper folders for original documents, and digital folders for downloaded statements and scanned receipts.
Keep the structure consistent across formats:
For high-volume categories, add monthly folders. For lower-volume categories, one annual folder may be enough.
Use descriptive digital filenames, such as:
YYYY-MM-DD_Vendor_DocumentType_Amount
A filename like 2026-10-08_OfficeSupplier_Receipt_48.20.pdf is easier to identify than scan0047.pdf.
Label paper folders just as clearly: “Expenses — October — 2026” or “Bank Statements — 2026.” Store long-term documents, such as active leases and business formation records, separately from routine monthly paperwork.
The goal is simple: someone using your system should be able to locate a document without guessing where you put it.
Filing documents and recording transactions are different tasks. Your filing system stores the evidence; your bookkeeping system summarizes the activity.
For example:
For each financial transaction, record the relevant details, including the date, customer or vendor, amount, purpose, and payment method. Where helpful, add an invoice number or document reference so you can find the supporting record later.
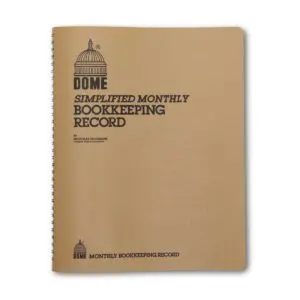
If you prefer paper tracking, a monthly bookkeeping record provides a structured place to summarize income and expenses. Dome’s monthly format includes a full-year record, a payroll section for up to six employees, a detachable summary sheet, and start-date flexibility.
For more frequent activity, a weekly bookkeeping record offers another recording rhythm within Dome’s record-keeping collection.
The important point is to use one clearly defined primary system. If you maintain both a spreadsheet and a paper book, decide which is authoritative and how updates move between them. Otherwise, you may create conflicting totals or duplicate entries.
A repeatable workflow prevents paperwork from becoming a permanent “to-do” pile.
Use three stages:
For a paper receipt, the process might look like this:
For an emailed invoice, save a copy in your digital incoming folder. Track whether it is unpaid or paid, record the appropriate information, and move it to its permanent folder after processing.
Keep unpaid customer invoices distinct from collected payments. Sending an invoice is not the same as receiving money. Likewise, avoid counting both an individual customer payment and the payment processor’s payout as separate income receipts.
Questions about when to recognize income or expenses should go to your accountant, particularly if you are unsure how your accounting method applies.
Some information needs more detail than a general income and expense ledger provides.
Keep a mileage record accessible so you can update it close to the time of each trip. Record the date, business purpose, distance, and relevant trip details.
The Dome Auto Mileage Log provides fields for odometer readings, miles driven, business purpose, parking, and tolls. It also includes a detachable year-end summary and a flexible start date.
Store related receipts with your vehicle records, and consult your tax professional about which expenses and trips qualify for your circumstances.
Maintain payroll documents separately from general expenses, with access limited to people who need them. Keep payroll summaries connected to your main bookkeeping system while protecting employee-specific information.
Organize rental records by property where practical. Keep equipment purchase and improvement records together so they remain accessible beyond the purchase year.
For contracts, use client, vendor, or project folders. Make sure active agreements, renewal dates, and relevant insurance documents are easy to locate.
Specialized folders should add useful detail—not become disconnected systems nobody reviews.
Organization works best as an ongoing habit rather than a year-end rescue project.
Set aside a regular appointment to:
The time required depends on transaction volume. A quiet consulting business may need a short check-in, while a retailer may need more frequent updates.
At month-end:
A check and deposit register can provide another record of account activity; Dome includes one in its accounting and record-keeping collection.
This monthly review is a checkpoint, not a substitute for recording transactions throughout the month.
An organized system also needs rules for what to keep, who can access it, and how to protect it.
Do not apply one disposal date to every document. Retention periods vary according to the record and your circumstances.
Before disposing of documents, review the IRS guidelines on how long to keep business records. Many income-tax supporting records fall under a general three-year retention period, but exceptions require longer retention. Employment tax records generally must be kept for at least four years after the tax becomes due or is paid, whichever is later. Property records may need to remain available through ownership and the applicable period after disposal.
State requirements, contracts, insurance needs, and other obligations may also affect retention. Confirm your policy with an appropriate professional before destroying records.
Keep paper records in a secure location and restrict access to digital files containing employee details, banking information, or confidential agreements.
Avoid storing your only copy of an important document on one device or in one physical location. Use a separate backup appropriate to your business, and periodically confirm that files are readable and recoverable.
Before discarding originals after scanning, confirm that your retention requirements permit it and that the digital copies are complete and legible.
The final quarter is a useful time to close gaps before they turn into tax-season delays.
Check for missing statements, unrecorded expenses, incomplete mileage entries, outstanding invoices, and documents your accountant may request. Create a “Year-End Review” folder for unresolved questions and relevant summaries.
You do not need to duplicate every file. A checklist pointing to the existing folders can be enough. The goal is to know what is complete, what is missing, and who needs to review it.
Organized records begin with a manageable system: clear categories, a consistent recording method, and a reliable place for supporting documents.
Dome’s record-keeping tools include monthly and weekly bookkeeping records, check and deposit registers, and mileage logs that can support this routine.
Choose the tools that fit your workflow, then give each document a clear path from arrival to recording to filing. That is how scattered paperwork becomes useful business information.
Use consistent categories, separate records by year, and establish a workflow for collecting, recording, and filing documents. Review the system regularly rather than letting unprocessed paperwork accumulate.
Yes. A paper book can summarize business transactions, but it should be supported by organized receipts, invoices, and other source documents. The IRS recognizes business books and supporting documentation as complementary parts of recordkeeping.
Either can work. For many small businesses, annual expense folders with monthly subdivisions provide a manageable structure. Higher-volume operations may benefit from additional expense-category folders.
There is no single retention period for every record. Many income-tax supporting records fall under a general three-year rule, but exceptions, employment taxes, property records, and other obligations can require longer retention. Confirm your requirements before disposal.
This guide provides general information and is not tax, legal, accounting, or payroll advice. Consult a qualified professional about your business’s recordkeeping and retention requirements.
Not sure which journal to give? Compare lined, dot-grid, grid, blank, and guided journals and match the right one to everyone on your gift list.

Prepare your business books for tax season with a year-end bookkeeping checklist covering income, expenses, account reconciliation, and records.

Find the right bookkeeping books for your business. Compare monthly and weekly records, payroll books, check registers, mileage logs, and more from Dome.

We’re inviting customers, creators, professionals, organizers, and community leaders to help more people discover the Dome products they know and trust.



Receive news and promotions by email from The Dome Companies. You can unsubscribe whenever you want.
By submitting this form, you are consenting to receive marketing emails from the Dome Companies. You can revoke your consent to receive emails at any time by using the unsubscribe link, found at the bottom of every email. We will not sell your inforation.